Table of Contents
- Why Inspectors Waste 10 Hours a Week on Admin
- Time Saving Tips for Site Inspectors: The Core Workflow
- Alternatives to Manual Field Data Entry for Inspections
- How to Organize Field Inspection Photos in Seconds
- Using Construction Inspection Report Templates
- Manage Mental Fatigue to Keep Inspections Fast
- Common Time Wasters to Eliminate
- Conclusion: Build a Faster Inspection Routine
- Frequently Asked Questions
Last Updated: September 5, 2026
Site inspection remains one of the most admin-heavy jobs in construction and property management. Most inspectors lose hours each week to manual paperwork, photo sorting, and report writing. In this guide from PhotoLog, we lay out practical time saving tips for site inspectors that cut the busywork without cutting corners on compliance or quality assurance.
The core problem is rarely the inspection itself but the field documentation that follows. A single site visit, 200 photos, paper notes, then office typing, renaming, and report building, eats hours. The most effective time saving tips target this post-field bottleneck.
Why Inspectors Waste 10 Hours a Week on Admin
The biggest time drain for site inspectors is manual data transfer (the CDC). Capturing notes on paper, then re-entering them into a computer, duplicates every piece of information you touch, costing several hours per week.
Treating the field notebook as the primary record is a common mistake. Photographing a defect, jotting the location, and later transcribing it into a report performs the same task three times, risking data accuracy loss and consuming minutes across a project lifecycle.
The fix starts with capturing data once, in a format that is already digital. According to guidance on digital transformation in construction, moving field data collection to mobile devices reduces administrative overhead by eliminating re-keying. This is the foundation of every other time saving tip .
Time Saving Tips for Site Inspectors: The Core Workflow
The most effective time saving tips follow a single principle: capture field data in its final format the first time, using a mobile inspection app that records photos, notes, GPS coordinates, and timestamps in one action.
A simplified workflow looks like this:
- Set up a session-based key for the site visit before you arrive
- Capture photos with automatic date, time, and location stamping
- Dictate or type notes directly onto each image
- Search your records by key or date back at the office
- Export a formatted field report without additional editing
This approach turns a 30-minute photo sorting session into a 2-minute search and improves regulatory compliance because every image carries verifiable metadata for hazard identification and incident reporting.
For teams documenting 200 to 300 photos per site visit, the difference is substantial, search by event key instead of renaming files and cross-referencing notes.
Create your session key before you step onto the site. Naming it after the project and date, such as “SiteA-2026-09-05,” keeps every photo from that visit automatically grouped and searchable.
Alternatives to Manual Field Data Entry for Inspections
Manual field data entry is the slowest part of any inspection routine. The primary alternatives are mobile apps with voice-to-text dictation, structured digital checklists, and automated geotagging.
Voice-to-text dictation is a standout option. Instead of typing notes with gloved hands, you speak the observation while the app transcribes it, faster than typing and keeps your eyes on the site condition.
Digital checklists standardize what you look at, ensuring you cover every compliance standard without relying on memory, and produce consistent data across multiple inspectors.
Automated geotagging removes another manual step. When your camera app records GPS coordinates automatically, you never type a location again. This is critical for environmental surveys and infrastructure management where precise coordinates support compliance. research on mobile data collection accuracy shows that automated metadata capture significantly reduces errors compared to handwritten location logs.
How to Organize Field Inspection Photos in Seconds
The conventional advice, rename files, sort into dated folders, and build a master spreadsheet, is exactly what costs you hours. The faster method is to make every photo self-organizing at capture, then let search replace folder structure, especially in low-connectivity environments where most inspectors work.
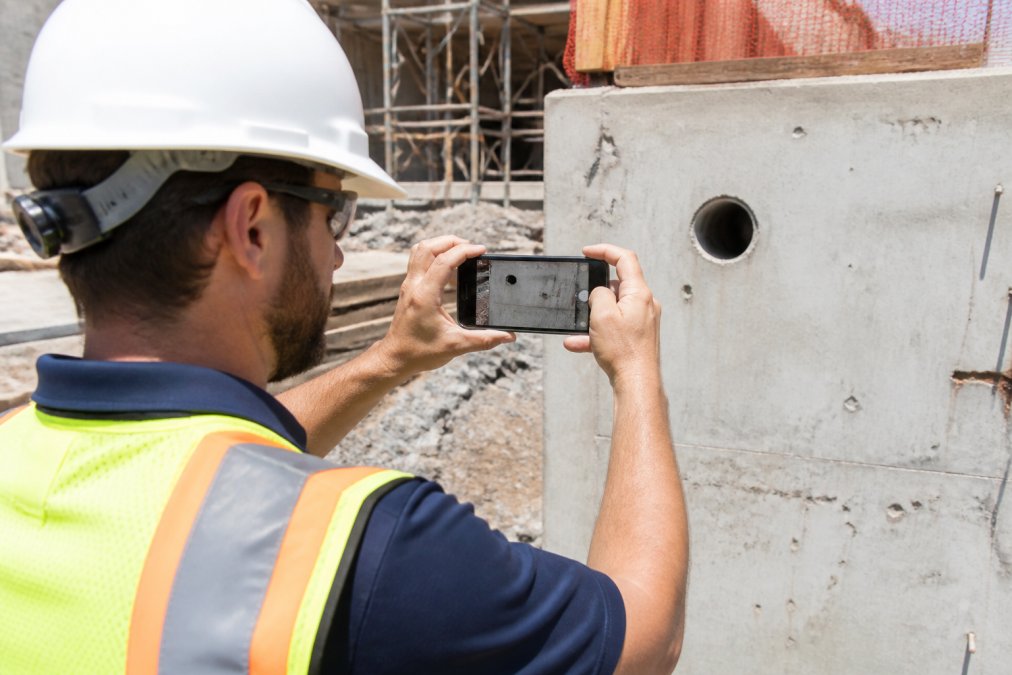
The Mechanism: Metadata-First Capture
A photo is only as useful as the data attached to it. When a photo carries a timestamp, GPS coordinates, and a session key, it becomes a searchable record. Here is the workflow that turns a 30-minute sorting session into a 2-minute search:
- Set your session key before you step on site. Use a consistent format like
ProjectCode-YYYY-MM-DD. This key is the single filter that groups every photo from that visit. - Enable geotagging and time stamping in your camera app settings before you start. Do not rely on memory to toggle it mid-inspection.
- Capture the photo, then immediately attach a short voice note or typed annotation. The note should state the defect, the location (e.g., “northwest corner, foundation wall”), and the severity. This takes 10 seconds per photo, not 2 minutes of later transcription.
- At the end of the visit, do not sort or rename. You simply search your database by the session key or date range. The app returns every relevant image in the order you captured them.
The Offline-to-Online Synchronization Problem
Most job sites, basements, parking garages, and remote infrastructure locations, have poor or nonexistent cellular service. If your tool requires a live connection, you are stuck waiting or risking data loss. The solution is a two-phase approach:
- Phase 1 (On-site): Capture everything directly to the device’s local storage. Photos, voice notes, and typed annotations are saved locally, with no dependency on a network signal. This means you never pause your inspection to wait for a spinner or a failed upload.
- Phase 2 (Post-visit): When you return to an area with Wi-Fi or a stable connection, trigger a bulk synchronization. The app uploads the entire session’s data, photos, metadata, and notes, as a single package. This is not a manual export; it is an automatic background sync that preserves the association between each photo and its annotation.
This offline-first approach is a data integrity safeguard. If you rely on a cloud-only tool and lose signal mid-capture, you risk losing evidence of a critical defect. A local-first tool ensures your record is complete before you leave the site.
Search Replaces Organization
Once your photos are synced with full metadata, folder structure becomes irrelevant. Here is how you retrieve a specific image:
- Search by session key: Type
SiteA-2026-09-05and pull every photo from that visit. - Search by date range: Pull all photos from the last week across multiple projects.
- Search by annotation text: Type “crack” or “water damage” to find every instance you noted across all sites.
The export step is equally fast. Select the session key, choose the output format (a formatted field report or a ZIP file of original images), and the tool assembles the package, ready for reporting, not manual assembly.
Test your offline workflow before you need it. On your next site visit, put your phone in airplane mode for the first 10 minutes of capture. Confirm that photos, voice notes, and annotations all save locally. If they do not, you are using the wrong tool for field work.
Using Construction Inspection Report Templates
A construction inspection report template is only half the solution. Most inspectors lose time not in writing the report but in the handoff, emailing PDFs, chasing confirmations, and answering follow-up questions. This section covers how to use templates to speed up the report and integrate output with the repair team.
The Template as a Data Capture Guide
A good template does more than format the final document; it guides your field data collection. A structured template eliminates the “what did I miss” anxiety and the return visits that follow.
Most construction inspection report templates include sections for:
- Site conditions and weather
- Safety protocols observed
- Work progress against schedule
- Defects and deficiencies found
- Photographic evidence with captions
- Sign-off and recommendations
Pair this template with a mobile capture tool that auto-populates metadata fields, date, time, GPS location, and inspector ID, so you only fill in observations, removing repetitive header typing.
The Post-Inspection Workflow Integration Gap
Here is where most guides stop. An inspection report that sits in an inbox is a pending action item, not a completed task. The bottleneck is often the handoff to the remediation team. Structure your report output so it is immediately actionable:
- Prioritize defects by severity and location. Do not bury a critical safety issue in paragraph three. Your template should force a clear, scannable list of findings, each tagged with a severity level (e.g., Critical, Major, Minor) and a specific location reference.
- Export in a format the team can act on. A PDF is fine for archival, but a structured data export (like a CSV or a shared digital list) allows the project manager to assign tasks directly from the report. This turns your inspection into a work order, not just a document.
- Include a clear recommendation field for each defect. State what needs to happen, not just what is wrong. For example, “Crack in northwest foundation wall, 3 mm wide. Recommend epoxy injection within 7 days.” This removes the interpretive step that causes delays.
The Template as a Communication Tool
A standardized template also reduces back-and-forth with clients and project managers. When every report follows the same structure, the reader knows where to find critical information, reducing follow-up emails and speeding up decision-making.
A report that groups photos by defect with severity tags and recommendations allows a project manager to approve a repair in minutes, not after a 30-minute phone call.
Do not over-narrate. A report that describes every minor cosmetic detail takes longer to write and longer to read. Focus on findings that affect safety, compliance, or the project lifecycle. If it does not affect the schedule or the budget, it belongs in a separate notes section, not in the formal report.
Closing the Loop with the Repair Team
The final step is ensuring the report does not become a dead end. After export, schedule a brief handoff, a short meeting or shared digital task list, with the remediation team. This 15-minute step prevents the most common time waster: a return visit to re-inspect a defect never addressed because the report was never read.
A report template is only as fast as your data capture method and your handoff process. Pair a digital template with a mobile app that feeds photos and notes directly into the report, and then structure the output so the repair team can act on it immediately. This eliminates the manual assembly step and the post-report bottleneck.
Manage Mental Fatigue to Keep Inspections Fast
Mental fatigue is an overlooked factor in inspection speed. The longer you work, the slower you move and the more likely you are to miss defects, directly affecting efficiency and documentation accuracy.
The fix is to reduce decisions during a site visit. Standardized checklists remove the “what do I check next” question, session-based keys remove the “how do I file this” question, and automatic stamping removes the “what time was this” question, each preserving mental energy for inspection work.
Tackling complex inspections early in the day, when cognitive load is lowest, produces faster and more accurate results. Scheduling simpler visits for later avoids burnout and improves operational efficiency.
Mental fatigue also comes from context switching. Jumping between a camera, notebook, and clipboard fragments attention. Consolidating capture into one mobile app keeps you in a single workflow, reducing the mental cost of switching tools.
Common Time Wasters to Eliminate
Several habits quietly consume inspection hours without adding value. Removing them is one of the fastest ways to reclaim time.
- Manual photo renaming: Typing descriptive filenames for 200 photos is pure overhead. Automatic time and location stamps make renaming unnecessary.
- Duplicate data entry: Writing notes on paper, then typing them into a computer, doubles your effort. Capture digitally once.
- Unstructured photo libraries: Photos without metadata require manual sorting and searching. Geotagged, timestamped images are instantly searchable.
- Over-narrated reports: Reports that describe every minor detail take longer to write and longer to read. Focus on findings that affect safety, compliance, or the project lifecycle.
- Chasing down missing information: When you forget to photograph a specific element or record a location, you schedule a return visit. Complete documentation on the first pass prevents rework.
Eliminating these time wasters also improves data accuracy. When you stop re-typing notes, you stop introducing transcription errors, resulting in cleaner records and fewer disputes.
Conclusion: Build a Faster Inspection Routine
The time saving tips for site inspectors share one theme: capture once, use everywhere. Digital field data collection, standardized checklists, and automatic metadata cut hours of administrative work from each week.
The challenge is consistency. Adopting these habits requires an initial adjustment, but the payoff is a faster routine with fewer errors and better compliance. Tools like PhotoLog support this workflow by transforming an Android device into a field documentation tool with automatic GPS geotagging, voice and typed annotations, and instant searchability by event key or date.
Get started with PhotoLog and turn your next site visit into a simplified, documentation-ready process.
Frequently Asked Questions
How do you prepare for a site inspection to save time?
Prepare the night before. Review the project plan, previous inspection notes, and relevant compliance standards. Charge your devices and check that your field documentation app has enough storage. Create a session key for the project so all photos and notes are grouped before you arrive. This front-end preparation removes decision-making on site and cuts your inspection time significantly.
What are the most effective alternatives to manual field data entry for inspections?
Voice-to-text dictation is the fastest alternative to typing notes on site. You can capture observations hands-free while your phone stays in your pocket. Mobile inspection apps that automatically geotag and time-stamp photos also remove manual sorting and data entry. Combining dictation with automatic photo metadata means your field documentation is complete the moment you leave the site.
How do you avoid rework during construction site inspections?
Rework often happens when the office team cannot read field notes or locate the exact defect. Use standardized checklists and a mobile inspection app that generates a formatted field report. Clear, time-stamped photos with typed or dictated notes give the project team the precise context they need to fix issues the first time.
What are the best practices for organizing inspection photos and notes?
Group photos by a session key or event name when you capture them, not after. Use an app that applies automatic date stamps and GPS coordinates so you never manually rename files. Dictate a note while the photo is fresh, then search by key or date later. This keeps your photo library searchable without a single minute of post-inspection sorting.
The article above is published by PhotoLog, a field documentation tool for Android. Download the free version to put these time saving tips into practice on your next inspection.
This article was written using GrandRanker