Table of Contents
- Why Organizing Inspection Photos Matters
- Set Up a Folder Structure and File Naming Convention
- How to Capture Precise GPS Coordinates and Metadata
- Site Photo Documentation Best Practices
- Organize and Remove Duplicates Efficiently
- Generate Construction Site Inspection Report Templates
- Automate Organization with Mobile Apps and Cloud Storage
- Maintain Long-Term Archival and Compliance Storage
- Frequently Asked Questions
Last Updated: September 1, 2026
Why Organizing Inspection Photos Matters
Without a system, inspection photos become a liability instead of an asset. You lose track of which photo shows what defect, can’t find images when clients ask about specific issues, and reports take twice as long to compile. The real cost isn’t time spent searching, it’s compliance risk. When documenting site conditions for legal purposes, you need proof that photos are timestamped, geotagged, and organized to withstand scrutiny. A disorganized photo library raises questions about whether your documentation is reliable.
This guide walks you through systematic photo organization, from folder structure through long-term archival. We’ll cover the technical foundation that makes photos searchable and defensible, field practices that ensure quality capture, and automation tools that eliminate manual sorting. Whether managing a single project or coordinating across multiple sites, these principles will cut reporting time and give you a trustworthy photo library.
The Construction Industry Institute’s documentation standards emphasize that systematic visual evidence collection is essential for project accountability and dispute resolution.
Set Up a Folder Structure and File Naming Convention
A folder hierarchy is your first line of defense against chaos. Start with this structure: Year > Project > Phase > Location > Date. This mirrors how you think about your work and makes retrieval intuitive.
Inside each date folder, create subfolders for specific areas: Foundation, Framing, Electrical, Plumbing, Exterior, Defects. This granularity matters when generating reports, you can pull all electrical documentation without sifting through hundreds of foundation photos.
Folder hierarchy by project and phase
Your folder structure should reflect both your project management workflow and retrieval needs:
2026/
├── ProjectName_ClientName/
│ ├── Phase_01_Foundation/
│ │ ├── 2026-03-15_Excavation/
│ │ │ ├── Foundation_Prep
│ │ │ ├── Soil_Conditions
│ │ │ └── Equipment
│ │ └── 2026-03-22_Forming/
│ ├── Phase_02_Framing/
│ │ ├── 2026-04-10_Structural/
│ │ └── 2026-04-18_Connections/
│ └── Phase_03_Closeout/
The key is consistency. Every project uses the same structure, every phase follows the same naming pattern. For environmental surveys or property inspections documenting multiple locations in a single visit, adjust to: Year > Survey_Type > Location > Date > Category. This keeps location-specific documentation together for compliance reporting.

Naming conventions for searchability
File names should tell you what’s in the photo without opening it: ProjectCode_Phase_Location_Description_YYYYMMDD_HHMMSS.
Example: ABC_Phase2_Foundation_CrackInConcreteNorthWall_20260315_143022.jpg
This approach is human-readable, sortable by date, and searchable. Avoid generic names like “IMG_001” or special characters except underscores. For teams using mobile apps, automated naming is essential. PhotoLog automatically applies consistent naming based on session key and timestamp, eliminating manual naming and human error.
How to Capture Precise GPS Coordinates and Metadata
Metadata transforms a photo from a generic image into defensible evidence. GPS coordinates prove location; timestamps prove when documentation occurred.
Geotagging for compliance and location verification
Enable automatic geotagging on your device before site visits. Most smartphones have this in camera settings under “Location Services.” Expect accuracy within 5-10 meters in open areas; 15-30 meters in dense urban areas (peer-reviewed research).
For critical compliance documentation, verify GPS accuracy at a known reference point before relying on it. Some teams use external GPS units for higher accuracy, especially for contaminated sites or utility locations. PhotoLog handles geotagging automatically, every photo is tagged with precise coordinates at capture time, making compliance-ready location data available without manual steps.
Timestamp and date stamping best practices
Timestamps prove when documentation occurred and create a chain of evidence. Enable automatic date and time stamping in camera settings to embed timestamps directly into image files, making them tamper-evident.
Synchronize your device’s clock with a network time source before fieldwork. For multi-day projects, ensure all team devices use the same timezone and time source. Timestamp consistency is critical, misaligned times undermine documentation credibility.
Site Photo Documentation Best Practices
How you capture photos determines whether they’re useful for reporting or just decorative. Poor angle, missing scale reference, or inadequate lighting creates ambiguity that weakens photos as evidence.
Capture scale and perspective for defect verification
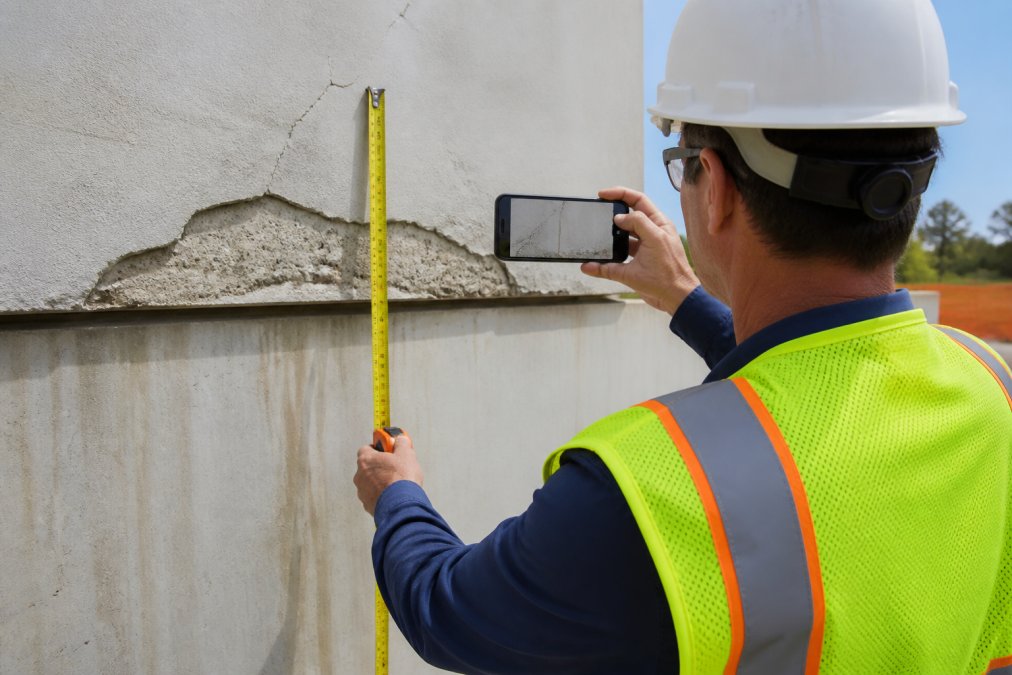
A photo of a crack without context is useless. Add a measuring tape or reference object, coin, pen, ruler, so viewers can judge severity. Photograph the defect with scale in frame, then capture broader context showing location.
Photograph defects straight-on when possible; oblique angles distort perception. Use consistent lighting to avoid harsh shadows or overexposure. Step back far enough to capture context but close enough that the defect is clearly visible on a smartphone screen at arm’s length.
Add annotations and notes during field inspection
Notes captured in the field are far more reliable than notes written later from memory. Use voice notes or typed annotations immediately after taking photos to describe what you’re seeing and capture context.
When using mobile apps, annotations become part of the photo record. PhotoLog attaches typed or dictated notes to images, creating a permanent link between photo and observation. For environmental surveys, include environmental conditions: “Clear sky, 15°C, no precipitation.” For infrastructure inspections, note equipment condition and visible wear.
Organize and Remove Duplicates Efficiently
After fieldwork, you’ll have duplicates, multiple shots of the same angle, test frames, accidental captures. Batch processing is faster than reviewing photos one by one. Import all photos to your project folder, then review them in a photo management tool that enables side-by-side comparison.
Mark duplicates for deletion, but review marked files once more before committing. Delete low-quality images, blurry shots, overexposed frames, and photos where defects aren’t visible. These add noise without information.
Generate Construction Site Inspection Report Templates
A report template ensures consistency across all documentation. Your template should include: project name and code, inspection date, inspector name, weather conditions, site conditions summary, findings by location or category, organized photos, and recommendations.
Create a template in Word, PDF, or specialized reporting software and use it as the baseline for every inspection. Organize photos within the report by location or category to match how clients think about their property. Automated reporting tools can pull photos directly from organized folders and insert them into templates. PhotoLog’s Field Report feature compiles session photos and annotations into formatted reports ready to share.
Automate Organization with Mobile Apps and Cloud Storage
Manual organization doesn’t scale beyond a few hundred photos. Automation handles repetitive work and eliminates human error.
Mobile capture and batch processing
Capture photos directly on mobile devices using apps designed for field documentation. The best apps handle metadata automatically, applying consistent naming, embedding timestamps, adding GPS coordinates, and linking annotations to each photo.
Batch processing lets you rename multiple files, move files to correct folders, and apply tags in a single operation. PhotoLog captures photos on Android devices with automatic geotagging, timestamp embedding, and note attachment. Every photo is instantly searchable by date or session key, and batch export generates formatted reports.
Cloud synchronization and offline access
Cloud storage makes your photo library accessible from anywhere. Offline access is essential for field teams, your app should work offline, then synchronize when reconnected.
Choose cloud services with strong privacy controls. Synchronization should be automatic and transparent. You take a photo, add notes, and the app handles the rest.
Maintain Long-Term Archival and Compliance Storage
Photos taken today might be needed for legal proceedings years later. Store photos in formats that remain readable for decades. JPEG is a safe choice, widely supported and unlikely to become obsolete.
Organize your archive by year and project, creating an index documenting what photos exist, when they were taken, and what they document. Create backup copies in geographically separate locations. Cloud storage providers handle this automatically through data replication.
Document your retention policy. For construction defect documentation, keep photos for the warranty period plus several years. For environmental surveys, check regulatory retention requirements. Consider creating a write-once archive, a copy that cannot be modified or deleted after creation, for compliance-sensitive documentation.
Periodically verify that archived photos remain accessible. Test your archival process regularly to catch problems before they become critical.
Organizing inspection photos creates a defensible record of your work. When you systematize your approach from folder structure through long-term archival, you transform raw field documentation into evidence that withstands scrutiny. PhotoLog simplifies this process by automating metadata capture and organization steps that would otherwise consume hours of manual work. Best practices for digital asset management in construction emphasize that systematic documentation reduces disputes and accelerates project closeout. The investment in a solid organizational system pays dividends every time you need to generate a report or answer questions about what was documented and when.
Frequently Asked Questions
What is the best folder structure for organizing inspection photos?
Use a hierarchy that mirrors your workflow: organize by project name first, then by site visit date or project phase, then by inspection category (e.g., electrical, structural, defects). This structure keeps photos searchable and audit-ready. Within each folder, name individual files with a consistent pattern: [ProjectCode]_[Date]_[Category]_[Description]. This combination ensures you can locate any photo in seconds, whether searching manually or using automated tools.
How accurate is GPS geotagging for compliance reporting?
Modern smartphone GPS provides accuracy within 5-10 meters under clear sky conditions, which meets most inspection and compliance requirements. For critical environmental or infrastructure work requiring higher precision, verify your device’s GPS accuracy before relying on it for official reports. Enable location services fully, capture photos in open areas when possible, and timestamp each image. Document your geotagging method in your field report so clients understand the data’s reliability and traceability.
Can I organize inspection photos offline and sync them later?
Yes. Mobile documentation apps like PhotoLog allow you to capture, tag, and organize photos entirely offline on your Android device. Metadata such as timestamps, GPS coordinates (when available), and typed or voice notes are stored locally. Once you return to an area with connectivity, sync your organized photos to cloud storage or export them as formatted reports. This workflow is essential for inspectors working in remote areas with spotty cell service, ensuring no data is lost.
What metadata should I include in site inspection photos for legal admissibility?
Include timestamp, GPS coordinates (geotagging), inspector name, project code, and a brief description of what the photo documents. For defect verification or post-repair checks, add before-and-after photo pairs with matching metadata. Voice or typed annotations explaining the defect, its location, and any corrective actions strengthen the evidence trail. This metadata ensures your photos are admissible for insurance claims, compliance audits, and legal disputes by establishing chain of custody and context.
This article was written using GrandRanker