Table of Contents
- What Georeferencing Field Photos Actually Means in Practice
- Ground Control Points and Spatial Reference Systems: The Foundation
- Geotagging Field Photos for Inspections: Automate the Capture Step
- Metadata Standards for Environmental Field Surveys
- How to Organize Field Photos for Reporting
- Transformation Methods and Accuracy: Affine, Polynomial, and Error Assessment
- Automated vs. Manual Georeferencing: Which Fits Your Workflow
- Troubleshooting Common Alignment Errors
- Frequently Asked Questions
Last Updated: September 28, 2026
What Georeferencing Field Photos Actually Means in Practice
Georeferencing field photos is the process of tying an image to real-world coordinates so every shot lands in the right spot on a map. This guide breaks down the field-tested practices that make that happen without a GIS degree. Most teams treat georeferencing as a desk job. It is not.
Ground Control Points and Spatial Reference Systems: The Foundation
Ground control points (GCPs) are known locations on the ground, surveyed to a precise coordinate, that anchor an image to reality. Without them, you are guessing. With them, you can measure and correct.
Selecting and Distributing Ground Control Points
Spread GCPs across the full frame, not clustered in one corner. Aim for at least four to six per site, with some near the edges, and include elevation changes where you can, flat distributions hide vertical error. Mark each point with something visible in the photo: a painted cross, a numbered target, or a permanent feature.
Choosing the Right Coordinate System and Datum
Pick your coordinate system and datum before you head out, not after. Mixing datums is a silent error source. A point that reads correctly in one system can sit metres off in another. For most regional work, a projected coordinate system tied to your area beats raw latitude and longitude.
Geotagging Field Photos for Inspections: Automate the Capture Step
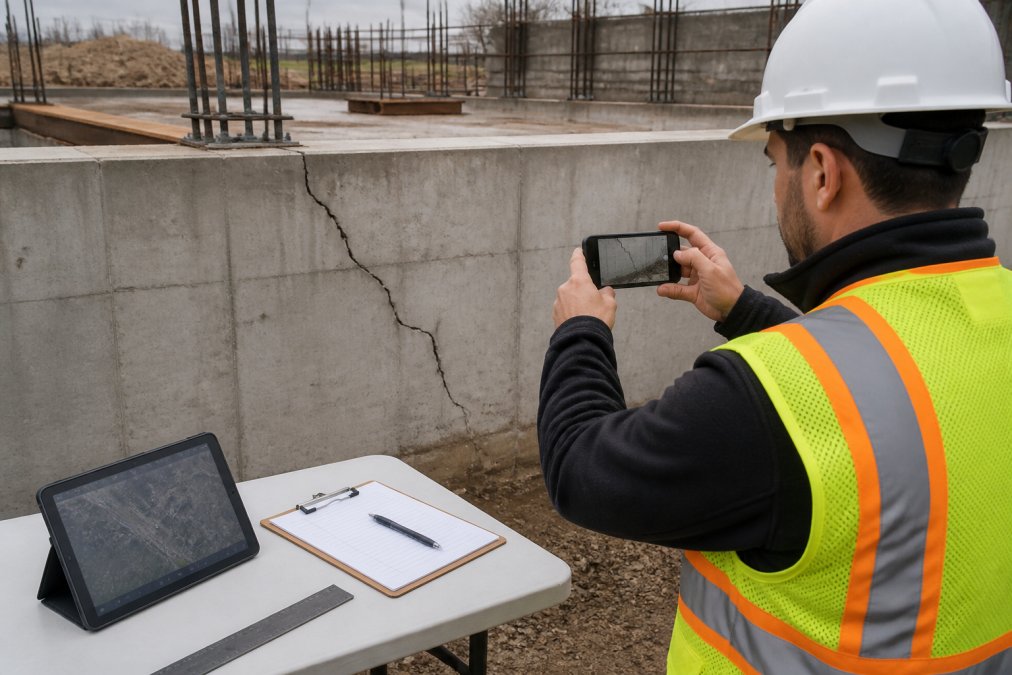
Geotagging field photos for inspections works best when the location is written into the file automatically at capture; manual entry invites typos and skipped steps. PhotoLog stamps GPS coordinates, date, and time the moment you take the shot, so metadata is baked in before you leave the site.
Mobile-First Field Workflows That Work Offline
Build your workflow around the phone, not the laptop. Phones go where laptops cannot.
- Cache your site boundary and GCP list before leaving signal range
- Capture photos in a session, keyed to the inspection or asset
- Add voice or typed notes on site, while memory is fresh
- Verify coordinates on the device before moving to the next point
Metadata Standards for Environmental Field Surveys
Metadata standards for environmental field surveys are the difference between a folder of images and defensible evidence. At minimum, every photo should carry coordinates, date, time, and a note on what it shows. Add observer name, project key, and equipment ID where your protocol requires it. The widely used EXIF and IPTC fields cover most of this, and tools like ExifTool documentation let you read and write those fields in bulk.
Managing Metadata for Field Photos at Scale
At scale, manual tagging collapses. A 300-photo site visit is not a tagging job, it is a data pipeline. The fix is session-based organization: group photos under a single event key so every image inherits the project context. PhotoLog does this with session keys, making a full day’s capture searchable by key or date in seconds.
How to Organize Field Photos for Reporting
Organizing field photos for reporting starts with a naming and folder structure decided before the first shot:
| Layer | What It Holds | Example Key |
|---|---|---|
| Project | Site or contract | SITE-014 |
| Session | Visit date and purpose | 2026-09-12-inspection |
| Asset | Component or location | foundation-north |
| Photo | Sequence and note | 004-crack-width |
Transformation Methods and Accuracy: Affine, Polynomial, and Error Assessment
Transformation methods decide how your image is warped onto the map. Pick the wrong one and no amount of clean control points will save the result. The three you will meet in field work are affine, polynomial, and orthorectification, each with a narrow band where it is the right call.
Affine: The Flat-Ground Default
An affine transformation applies scale, rotation, and translation, nothing else. Straight lines stay straight, parallel lines stay parallel. That is what you want when the terrain is flat, the camera is roughly nadir (pointing straight down), and the subject plane is level. It is also the most stable transformation because it cannot overfit: with three non-collinear control points, the math is fully determined.
Polynomial: When the Ground Bends
A first-order polynomial is mathematically identical to affine. The difference starts at second order, which adds curvature terms and lets the image bend to fit more control points across uneven ground, useful for rolling terrain, gentle slopes, and scanned paper maps with distortion.
Orthorectification: The Right Tool for Aerial and Photogrammetry
If your imagery comes from a drone, aircraft, or any oblique angle over terrain with elevation change, neither affine nor polynomial is correct. Orthorectification uses a digital elevation model (DEM) to remove terrain displacement pixel by pixel, so a point on a hillside lands where it actually sits. This is the standard for aerial survey work and any photogrammetry deliverable where you intend to measure distance or area.
Reading RMSE Without Fooling Yourself
Root mean square error (RMSE) is the average gap between where your control points actually are and where the transformation puts them, reported in the units of your coordinate system, usually metres for projected systems.
What counts as acceptable depends on the job:
- Sub-metre RMSE is the target for survey-grade work and legal deliverables.
- 1-3 m RMSE is normal for handheld field photos placed with consumer GPS and a handful of control points.
- Above 5 m RMSE almost always means a datum mismatch, a bad control point, or a misidentified point in the image, not a transformation problem.
Match the transformation to the terrain, not to the software default. Affine for flat and nadir, polynomial for gentle relief with enough spread points, orthorectification for anything aerial or oblique. Then verify with a held-back check point before you trust the number.
Automated vs. Manual Georeferencing: Which Fits Your Workflow
Most guides frame this as a binary. In practice, the useful question is not automated or manual, it is where in the workflow each one belongs. The gap in some content is real-time, on-device georeferencing: placing a photo against a cached basemap while you are still on site, before you lose the context that makes correction cheap.
What Automated Georeferencing Actually Does
Automated georeferencing reads the coordinates already embedded in the photo’s EXIF data and drops the image onto the map at that point, no control points, no transformation math, no operator judgment. It is fast, scales to thousands of photos, and is the correct default for most field documentation.
Potential failure modes include:
- Missing or stripped metadata. Some camera apps, messaging apps, and cloud uploads silently remove GPS tags. A photo with no coordinates cannot be auto-placed.
- Bad fix at capture. Urban canyons, dense canopy, and indoor shots can produce a coordinate that is tens of metres off, or a fix that looks valid but is not.
- Wrong datum assumption. If the tool assumes WGS 84 and your project uses a projected system tied to a specific datum, every auto-placed photo inherits the offset.
What Manual Georeferencing Buys You
Manual georeferencing means picking control points in the image and matching them to known coordinates on a map. It is slower, requires a trained eye, and does not scale past a few dozen images per session. What it buys is precision and the ability to recover photos automation cannot place, those with no metadata, an oblique angle, or a bad GPS fix.
The Mobile-First Middle Path
The workflow most field teams are missing sits between the two: georeference on the device, in real time, against a cached basemap:
- Pre-load the site boundary, control point list, and basemap tiles while you still have signal. Offline map caches are the enabler here, without them, the workflow dies the moment you leave coverage.
- Capture with GPS on, so the coordinate is written at the moment of the shot.
- Verify on screen immediately. The photo appears on the cached basemap. If the pin is in the wrong place, you know now, not three weeks later at the desk.
- Correct in the field by nudging the pin against a visible landmark, or by flagging the shot for manual control-point placement back at the office.
- Tag the session so the corrected coordinate and the original GPS reading both travel with the file.
A Decision Rule You Can Apply on Site
- Flat, open, clear sky, metadata intact → automated capture, verify on device, move on.
- Canopy, urban, or indoor → automated capture, then verify the pin against a landmark before leaving the point.
- No metadata, oblique angle, or measurement-grade use → flag for manual control-point placement.
- Legal or compliance deliverable → manual placement regardless of how good the GPS looked.
Build the verification step into the capture session, not the export. A photo you have not seen on a map is a photo you have not georeferenced, you have only tagged it.
For field teams that want capture and verification handled in one pass, PhotoLog turns an Android device into a documentation tool that geotags, timestamps, and organizes as you work. Download Free and test the workflow on your next site visit.
Troubleshooting Common Alignment Errors
Alignment errors usually trace to one of four causes. Work through them in order:
- Wrong datum or coordinate system. Re-check the system recorded at capture.
- Too few or clustered control points. Add points, spread them out.
- Bad GPS fix. Urban canyons and tree cover degrade signal. Re-capture with a clear sky view.
- Stale metadata. Time or date drift throws off session grouping. Verify device clock settings.
Skipping the error check before submitting a report is the fastest way to lose client trust. A single misplaced photo can call an entire survey into question.
Frequently Asked Questions
What is the importance of georeferencing in field documentation?
Georeferencing ties every field photo to a real-world location, so you can measure distance, verify compliance, and prove where and when work happened. For inspections, environmental surveys, and infrastructure tracking, it turns a simple image into verifiable evidence. Without it, photos are just pictures; with it, they become spatial records you can map, search, and audit.
How does automatic geotagging improve field report accuracy?
Automatic geotagging removes manual entry errors. When your camera app writes GPS coordinates and timestamps directly into the image metadata, you eliminate transcription mistakes and ensure every photo is tied to the correct spot. This helps with reporting because you can search by location or date instead of sorting through folders. For teams doing geotagging field photos for inspections, it can lead to more efficient reporting.
What are the common challenges when georeferencing field photos?
Common issues include poor GPS signal in urban canyons or dense tree cover, mismatched coordinate systems, and insufficient ground control points. Metadata can also be stripped during file transfers. To avoid these, verify your coordinate system before you start, use a mobile app that stores GPS data reliably, and always check a few points against known references before processing a full batch.
What metadata should be included with georeferenced field photos?
At minimum, include latitude, longitude, altitude, date, time, and a unique session or project key. For environmental surveys, add collector name, equipment used, and any relevant notes. Following metadata standards for environmental field surveys means capturing enough detail to reproduce the survey and meet audit requirements. Use tools that write this data automatically to avoid gaps.
Field documentation only holds up when the location data holds up. If your current setup leaves you fixing coordinates back at the desk, that is time you never get back. PhotoLog captures GPS coordinates, date and time stamps, and voice or typed notes at the moment of the shot, then exports a formatted field report in a single ZIP. Get started with PhotoLog and turn every site visit into searchable, report-ready evidence.