Table of Contents
- Why Construction Progress Photos Matter
- Best Practices for Construction Progress Photography
- Setting Up a Construction Site Photo Management System
- Geotagging Construction Photos for Legal Compliance
- Capturing and Annotating Images in the Field
- Construction Daily Report Photo Requirements
- Mobile-First Workflow Optimization for Field Teams
- Post-Project Archiving and Data Retention
- Frequently Asked Questions
Last Updated: September 26, 2026
Why Construction Progress Photos Matter
Construction progress photos are your visual record of what happened on site. They protect you legally, help manage timelines, and settle disputes before they become expensive.
The real problem: organizing photos so they’re useful. A folder with 500 unlabeled images from three sites isn’t documentation, it’s chaos.
Properly geotagged, timestamped, and annotated photos become evidence: proof of pre-existing conditions, timing of critical installations, and hidden work. That’s the difference between a photo and a legal record.
Construction progress photos transform raw images into searchable, defensible documentation that protects your project timeline and your liability exposure.
Best Practices for Construction Progress Photography
Effective construction progress photos follow a system. Without one, you’re just collecting images.
Establish a consistent capture schedule
Capture photos on the same day each week (two to three times per week shows meaningful progress without excess volume). Pick a consistent time; morning light reduces extreme shadows. Consistency matters more than perfection.
Photograph the same areas repeatedly (north wall on weeks one, three, and five). This visual progression shows progress clearly and catches problems early.
Set a phone reminder for your capture time. Consistency compounds, three years of weekly photos creates an undeniable project timeline that protects you in disputes.
Capture from consistent angles and distances
Photograph from the same spot and distance each time to show real change, not just different angles. Mark capture positions (painted marks, building corners, or reference points) if the site layout is stable.
Vary angles deliberately (wide shots, close-ups, overhead shots if safe), but repeat each angle consistently so comparisons are meaningful.
Document existing conditions before work starts. These baseline photos are your proof of what was already there. They protect you against claims that you damaged something that was already damaged.
Setting Up a Construction Site Photo Management System
Organization starts the moment a photo is taken. Without a system, searchability disappears and your photos become useless.
Create standardized naming conventions and folder structures
Use a naming convention: 2026-09-26_SiteName_NorthWall_Progress.jpg. This format enables instant sorting by date, searchability by site name, and clarity on subject area without opening the file.
Create a folder structure mirroring your project breakdown (Project Name > Site Address > Phase > Area).
Implement session-based organization
Group photos by visit in session folders, with subfolders by area or trade. Document session details (date, inspector name, weather, issues noted). This context is essential for later review.
A common mistake is mixing photos from different dates into single “General” folders. Six months later, you cannot tell when work happened or what sequence events occurred. This destroys the legal value of your documentation.
Geotagging Construction Photos for Legal Compliance
GPS data proves location, but courts and insurance adjusters require documented chain of custody proving authenticity, lack of alteration, and authorization.
Understand legal admissibility standards for construction photos
Authenticity, Metadata (EXIF data) proves genuineness, but only if unaltered. Edited photos raise authenticity questions.
Preserve original metadata and prevent alteration
Metadata (date, time, GPS, camera model, exposure settings) proves authenticity. Never edit photos intended as legal evidence; editing software can modify or strip EXIF data, flagging it as altered and undermining credibility.
Document photographer identity and authorization
Document photographer name/ID in session logs. Create a simple log for each visit (date, time, photographer name/role, areas, defects, weather). For sensitive documentation, have the photographer sign or electronically verify the log.
Verify GPS accuracy and document limitations
GPS accuracy varies by location (urban: 10-20m, open sites: 5-10m, survey-grade: sub-meter). Verify GPS is functioning before critical work. For routine progress photos, standard phone GPS is acceptable. For critical installations or regulatory compliance, acknowledge GPS limitations in reports.
Create a metadata verification checklist
Verify metadata completeness before archiving: date/time correct, GPS coordinates present and reasonable, camera/phone model recorded, file unedited, photographer documented, original format preserved. Spot-check photos monthly for consistency.
If photos are later needed for a dispute or insurance claim, metadata gaps or evidence of editing can disqualify them as evidence. Verification during the project is far easier than trying to reconstruct chain of custody months or years later.
Capturing and Annotating Images in the Field
Photos are most valuable when they include context. Annotations and notes transform a generic image into documented evidence.
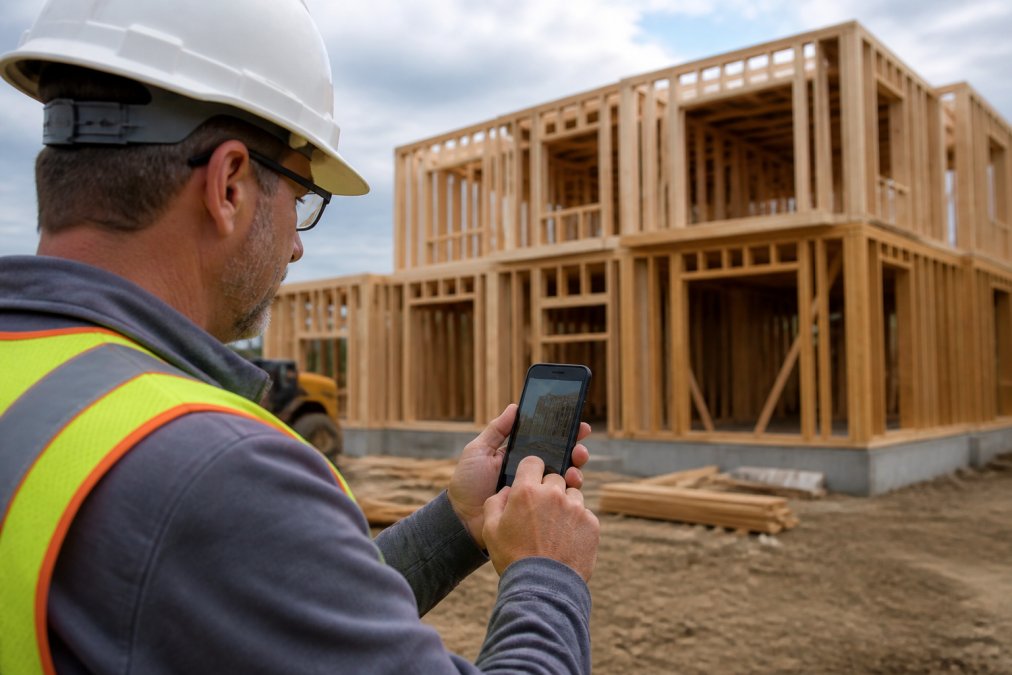
Add typed or voice notes immediately after capture
Capture observations on-site while looking at the work. Use voice or typed notes with specific details: area, measurements, defects, weather, and site conditions. Example: “North wall, second floor, concrete pour completed to line, no visible cracks, weather clear.” Consistent habits in documenting inspection findings provide a reliable record that proves invaluable when resolving liability disputes or streamlining your insurance claim process.
Document hidden installations and critical details
Photograph MEP work before it’s covered (proof of specification compliance). Get close-ups of connections, labels, and details. Document temporary protection and safety measures. Capture the sequence of critical work to prevent disputes about timing and completion.
Construction Daily Report Photo Requirements
Daily reports that include photos are more credible than reports with text alone. Photos prove what you’re claiming.
Include metadata in your reports
Metadata includes date, time, GPS location, and photographer name. This information should be visible in your report, not hidden in file properties.
Generate professional formatted reports
Reports should be easy to read and easy to share. Photos should be sized appropriately, not so large they’re unwieldy, not so small they’re illegible.
Mobile-First Workflow Optimization for Field Teams
Optimize your phone for construction photography to prevent blurry images, lost metadata, failed backups, and inconsistent quality.
Configure phone camera settings for consistent field capture
Configure these camera settings on every phone: Enable grid lines (consistent framing). Disable digital zoom (move closer instead). Enable HDR mode (captures detail in extreme lighting). Turn off filters and beauty modes (capture raw images). Enable location services and geotagging. Set date and time to automatic sync.
Create a standardized field capture workflow
Standardize the capture workflow: Before site (charge phone, verify GPS/cloud backup, open project folders). Upon arrival (wide photo with date, document weather/access, identify areas). During capture (same angles/distances, three photos per area, add notes immediately). Before leaving (review focus/exposure, organize into session folders, verify backup).
Implement automated backup with verification
Automate backup and verify it’s working. Enable automatic cloud sync over Wi-Fi and mobile data. Test monthly: take a photo Monday, confirm it appears in cloud storage by Tuesday. Use two backup methods if possible (Google Photos + company server).
Train your team on consistency and naming discipline
Consistency requires discipline. New team members especially need clear instruction.
Create a one-page field guide:
- Camera settings to use
- Naming convention format (e.g.,
2026-09-26_SiteName_NorthWall_Progress.jpg) - Folder structure to follow
- What to photograph and from where
- How to add notes and annotations
Conduct a test visit:
- Have new team members photograph a site under supervision
- Review their photos for consistency, focus, and proper naming
- Correct issues immediately
- Repeat until they’re capturing photos to standard
Audit consistency monthly:
- Review a random sample of photos from each team member
- Check that naming conventions are followed
- Verify that metadata is complete
- Provide feedback and retraining if standards slip
Consistency compounds over time. Three months of inconsistent capture creates a chaotic archive. Three months of disciplined capture creates a searchable, defensible project record. The effort invested in training and auditing pays off when you need to find a specific photo or defend a timeline.
Manage phone storage to prevent capture failures
Phones with full storage cannot capture new photos. This is a common field problem.
Monitor available storage:
- Check your phone’s storage status weekly
- Keep at least 10% of storage free (e.g., if your phone has 128 GB, keep at least 12 GB free)
- If storage is low, delete old photos after confirming they’ve synced to cloud backup
Offload photos regularly:
- Don’t keep months of photos on your phone
- After each site visit, confirm photos have synced to cloud storage, then delete them from your phone
- This frees up storage and ensures you have a backup
Use cloud-based file management:
- Access your project folders through a cloud app (Google Drive, OneDrive, Dropbox) rather than storing everything locally
- This reduces phone storage pressure and keeps files accessible from any device
Post-Project Archiving and Data Retention
After a project closes, your photos become your historical record. Archive them properly so they remain accessible and legally valid.
Frequently Asked Questions
Why is geotagging important for construction progress documentation?
Geotagging records the exact location where each construction progress photo was taken, creating an auditable record of work completed at specific site coordinates. This is critical for legal compliance, insurance claims, and liability protection. When disputes arise about what work was done where, timestamped and geotagged images provide verifiable evidence that holds up in documentation reviews and compliance audits.
What should be included in construction daily report photo requirements?
Each construction daily report should include photos with complete metadata: GPS coordinates, timestamp, photographer name, and descriptive notes about the work shown. Include images of existing conditions at the start of each phase, milestone achievements, hidden installations before they’re covered, and any defects or issues requiring attention. Organize photos by project area or trade, and ensure your report clearly documents progress against the project schedule.
How do I organize thousands of construction site photos effectively?
Use a standardized naming convention based on date, project phase, and location (e.g., 2026-01-15_Foundation_North-Wall_01.jpg). Create folder structures that mirror your project breakdown: by trade, by phase, or by building section. Add searchable metadata like GPS tags and timestamps automatically during capture. Session-based organization, grouping photos by inspection date or milestone, makes retrieval faster and reporting simpler when you need to pull images for client updates or compliance verification.
Will construction progress photo documentation work offline on remote job sites?
Yes. PhotoLog captures and stores all photos, GPS data, and annotations directly on your Android device, so you can document work even without cell service. Photos are timestamped and geotagged in real time, and all data syncs once you reconnect to a network. This is essential for remote sites where connectivity is spotty, you never lose documentation, and your field team stays productive regardless of signal strength.